Sunday, March 11, 2012

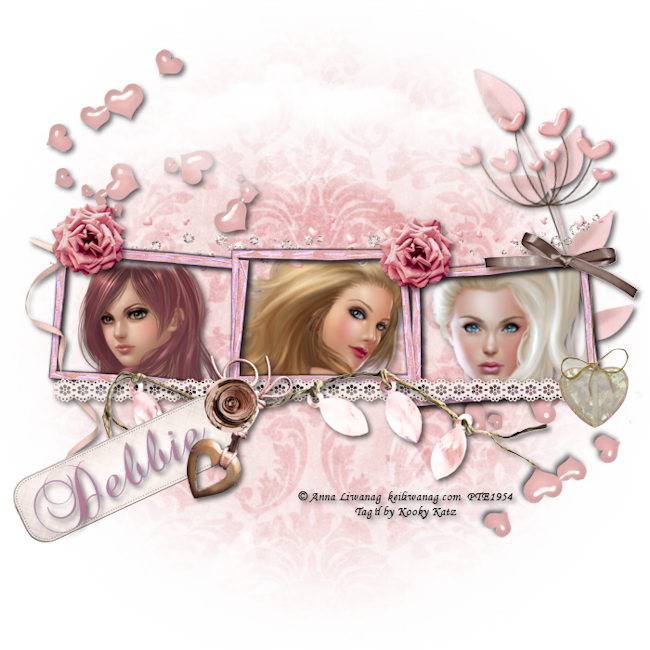
Blush

Blush

 Supplies
PSP - I am using PSP X2 (But an older version should work also)

I used the gorgeous kit “Blush” by Polka Dot Scraps
You can purchase this kit from

Thank you Chassity for this beautiful kit!

Tubes of choice, I used the wonderful artwork of Anna Liwanag
You will need a license to use her work,
you can get one here

Mask of choice, I used Mask 20 from Horse Play’s Pastures here

Font of choice, I used Brock Script, here

Xero Plugin – Porcelain


Notes
This tutorial assumes you have a working knowledge of PSP.
Install the mask if needed
Use the following settings for drop shadow,
unless otherwise stated:
Effects>3D>Drop Shadow>
V 3
H 3
Opacity 60
Blur 8
Color Black
Shadow on new layer unchecked
(Of course you are always free
to use your favorite settings for
the drop shadow!)


=^_^=   Ready to start?  Let’s go!  =^_^=

File> New
Image> Canvas Size>700x700
Flood fill with white

Layers>New Raster
Selections>Select All
Copy Paper3
Paste into selection
Layers>Load/Save Mask>Load Mask From Disk
Source Luminance checked
Fit to Layer checked
Invert transparency not checked
Hide all mask checked
Layers>Merge>Merge Group
Selections>Select None

Copy/Paste Frame 5 as a new layer
Image>Free Rotate>Left 90 degrees
Add drop shadow

**Do this for all three tubes**
Maximize your tubes
Copy/Paste As A New Layer
under the frame layer
Place in the frame, resize if necessary
When you have the tubes in the order you like,
take your eraser tool and erase the parts of the tubes
that are outside the frame.


Add your embellishments, I used the following:

Ribbon1>Resize 35%
Ribbon4Resize 50%
Scatter2>Resize 50%
Layers>Duplicate
Image>Mirror>Flip
(erase any part you don’t want showing)
String>Resize 80%
Scatter3
Flower2
(erasing parts you don’t want showing)
Leaves2
(erasing parts you don’t want showing)
Heart2>Resize 40%
Flower3>Resize 20%
Flower4>Resize 20%
Lace1

Add your copyright and license number and text
Add your watermark

Layers>Merge>Merge Visible
Image>Resize 80% (650x650)

I used color #952a2a
for the background for my name
Font Size 72
Add drop shadow
Add porcelain effect

If you are using a white background you can
Layers>Merge>Merge All (Flatten)
File>Export>JPEG Optimizer
Set compression value to 25
Save to where you want

If you are using a transparent background you can
File>Export>PNG Optimizer
Click “ok” on the next screen
Save to where you want

I hope you have enjoyed this tutorial!


Rock Around The Clock

Rock Around The Clock

Supplies
PSPX2 (an older version will work also)

I used the scrapkit Sock Hop by Diva Designz
you can purchase it at Diva Designz

Thank you Mandy for some great memories this kit brought back!

Tube/s of choice: I am using the artwork of ©Pinup Toons
 You can purchase a license here

I am using tag template #69 at Elegant Inspirations

Choice of font, I used Cartoon here

Xero Plugin – Porcelain

Notes
Install mask if needed
This tutorial assumes you have a working knowledge of PSP
Use the following settings for drop shadow, unless otherwise stated:
Effects>3D>Drop Shadow>
V 3
H 3
Opacity 60
Blur 8
Color Black
Shadow on new layer unchecked
(Of course you are always free
to use your favorite settings for
the drop shadow!)


=^_^=   Ready to start?  Let’s go!  =^_^=

Open the template
Duplicate it (Shift +D)
Close the original without saving
Delete the first layer (Credits)
Delete layers New Year1 and New Year2

Image>Canvas Size
Use the settings below
Width> 739
Height> 700
Placement>Center
We will be resizing after all steps are done

Highlight the bottom roster and
flood fill white
 
Highlight Green Circle
Click inside with your Magic Wand
Making sure you get all the green
that is inside numbers 4, 6, 8, 9 and 10
Copy/Paste Paper 8 as a new layer
Selections/Invert
Tap the delete button on your keyboard
Selections>Select None
Delete the original layer

Layers>View>None
On your Layer Palette reopen:
Hand1
Hand2
Dot
Numbers 12 down to 1
Layers>Merge>Merge Visible
Selections>Selection All
Selections>Select Float
Selections>Modify>Expand>2
Using color #66def6,
flood fill your merged layer
Selections>Select None
Add drop shadow
Add porcelain effect
Close out your merged layer
Highlight White Circle layer
Click inside with your Magic Wand
Floodfill using color #fcbfde
Selections>Select None
Add drop shadow
Add porcelain effect
Layers>View>View All
 
Highlight Black Circle
Click inside with your Magic Wand
Using color #66def6,
flood fill your merged layer
Selections>Select None
Add drop shadow
Add porcelain effect
 
Highlight Grey Circle 1
Click inside with your Magic Wand
Selections>Modify>Expand>5
Copy/Paste Paper 7 as a new layer
Selections/Invert
Tap the delete button on your keyboard
Selections>Select None
Delete the original layer
Add drop Shadow
Apply porcelain effect

Highlight Grey Circle 2
Click inside with your Magic Wand
Selections>Modify>Expand>5
Copy/Paste Paper 7 as a new layer
Selections/Invert
Tap the delete button on your keyboard
Selections>Select None
Delete the original layer
Add drop Shadow
Apply porcelain effect

Highlight Green Square1
Click inside with your Magic Wand
Selections>Modify>Expand>4
Copy/Paste Paper 9 as a new layer
Selections/Invert
Tap the delete button on your keyboard
Selections>Select None
Delete the original layer
Add drop Shadow
Apply porcelain effect

Highlight Green Square2
Click inside with your Magic Wand
Selections>Modify>Expand>8
Copy/Paste Paper 9 as a new layer
Selections/Invert
Tap the delete button on your keyboard
Selections>Select None
Delete the original layer
Add drop Shadow
Apply porcelain effect

Open Paper 6
On your Material Palette click on Pattern
Use these settings:
Current Pattern>Paper 6
Angle>0
Scale>25

Highlight Green Square1
Click inside with your Magic Wand
Selections>Modify>Expand>6
Floodfill with your pattern
Selections>Select None
Add drop Shadow
Apply porcelain effect

Highlight Green Square2
Click inside with your Magic Wand
Selections>Modify>Expand>6
Floodfill with your pattern
Selections>Select None
Add drop Shadow
Apply porcelain effect

Highlight Dark Grey Rectangle
Click inside with your Magic Wand
Copy/Paste Paper 8 as a new layer
Selections/Invert
Tap the delete button on your keyboard
Selections>Select None
Delete the original layer
Add drop Shadow
Apply porcelain effect

Highlight Small Rectangle2
Click inside with your Magic Wand
Copy/Paste Paper 4 as a new layer
Selections/Invert
Tap the delete button on your keyboard
Selections>Select None
Delete the original layer
Add drop Shadow
Apply porcelain effect

Highlight Green Rectangle
Click inside with your Magic Wand
Selections>Modify>Expand>6
Copy/Paste Paper 9 as a new layer
Selections/Invert
Tap the delete button on your keyboard
Selections>Select None
Delete the original layer
Add drop Shadow
Apply porcelain effect

Closing off your bottom layer
Layers>Merge>Merge Visible
Image>Resize 80%

Copy/Paste your tube, position as you like

I used the following embellishments:
Jukebox
Shoe
Music Note2 >Resized 10%
Music Note1>Resized 10%
Music Note2>Resized 10%

Close off the white bottom layer
Layers> Merge>Merge Visible
Resize 80%>All layers not checked

I used colors #ffffff for the foreground
And #f797c9 for the background for my name
2.0 Stroke
Font Size 100
Place the name where you want
Selections>Select All>Selections Float
Adjust>Add/Remove Noise>Noise
Gaussian>30%>Monochrome not checked
Selections>Select None
Add Drop Shadow

Add the proper copyright and license information

If you want to use the white background you can
Layers>Merge>Merge All (Flatten)
File>Export>JPEG Optimizer
Set compression value to 25
Save to where you want

If you want to use the transparent background you can
File>Export>PNG Optimizer
Click “ok” on the next screen
Save to where you want

I hope you have enjoyed this tutorial!
Saturday, March 10, 2012

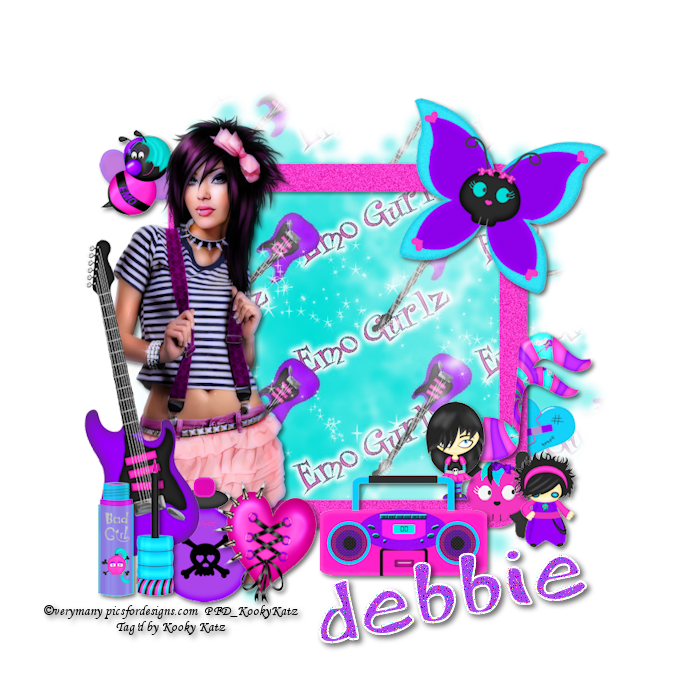
Emo Gurlz Rock!

Emo Gurlz Rock!

 Supplies
PSP - I am using PSP X2 (But an older version should work also)

Supplies
PSPX2 (an older version will work also)

Scrapkit: Emo Gurlz by Freeks Creations
you can purchase it at Sunshine Daze

Thank you Freek for a really fun kit to work with!

Tubes of choice - I am using the artwork of Verymany
you can purchase her work here

 Mask of choice, I used Mask 10 from Horse Play’s Pastures here

Font of choice, I used Cartoon here

Xero Plugin – Porcelain

This tutorial assumes you have a good working knowledge of PSP.
Use the following settings for drop shadow, unless otherwise stated:
Effects>3D>Drop Shadow>
V 3
H 3
Opacity 60
Blur 8
Color Black
Shadow on new layer unchecked
(Of course you are always free
to use your favorite settings for
the drop shadow!)

Install any mask or plugin you need before starting

=^_^=   Ready to start?  Let’s go!  =^_^=

Open a new file, transparent, 700x700
Flood fill white

Layers>New Raster Layer
Selections>Select All
Open paper 1
Copy/Paste Paper 1 Into Selection
Layers>Load/Save Mask>Load Mask From Disk
Fit to canvas checked
Source luminance checked
Invert transparency not checked
Hide all mask checked
Layers>Merge>Merge Group
Selections>Select None

Open E40>Resize 80%
Copy/Paste as a new layer
Add drop shadow

Copy/Paste your tube as a new layer
Resize if needed
Add drop shadow
Add porcelain effect if desired

The embellishments I used are:
E2>Resized 35%
E8>Resize 35%
E9>Resize 50%
Image>Free Rotate>Right 15 degrees
E5 and E6>Resize 25%
E10>Resize 30%
E11>Resize 50%
Image>Free Rotate>Right 15 degrees
E20>Paste above the mask layer
E13>Resize 75%
Image>Free Rotate>Left 15 degrees
E17>Resize 20%

Close off the white bottom layer
Layers> Merge>Merge Visible
Resize 80%>All layers not checked

I used colors #9800f7 for the foreground
And #ffffff for the background for my name
2.0 Stroke
Font Size 100
Place the name where you want
Selections>Select All>Selections Float
Adjust>Add/Remove Noise>Noise
Random>20%>Monochrome not checked
Selections>Select None
Add Drop Shadow

 Add the proper copyright and license information

If you want to use the white background you can
Layers>Merge>Merge All (Flatten)
File>Export>JPEG Optimizer
Set compression value to 25
Save to where you want

If you want to use the transparent background you can
File>Export>PNG Optimizer
Click “ok” on the next screen
Save to where you want

I hope you have enjoyed this tutorial!


Friday, March 9, 2012

Deep in the Heart

Deep in the Heart

Supplies
PSPX2 (an older version will work also)

I used the scrapkit Deep in the Heart by Skulliez Skrapz
you can purchase it at Pimp My Tags w/Scraps

Thank you Danielle for a very pretty patriotic kit to work with!

Tube/s of choice: I am using the artwork of ©Keith Garvey
 You must have a license to use his work. 
You can purchase a license here

Choice of font, I used Wallow Hmk Bold here

Mask of choice, I used Mask 10 from Horse Play’s Pastures here

Xero Plugin – Porcelain

Notes
Install mask if needed
This tutorial assumes you have a working knowledge of PSP
Use the following settings for drop shadow, unless otherwise stated:
Effects>3D>Drop Shadow>
V 3
H 3
Opacity 60
Blur 8
Color Black
Shadow on new layer unchecked

=^_^=   Ready to start?  Let’s go!  =^_^=

Layers>New Raster
Selections>Select All
Copy Paper1
Paste into selection
Layers>Load/Save Mask>Load Mask From Disk
Source Luminance checked
Fit to Layer checked
Invert transparency not checked
Hide all mask checked
Layers>Merge>Merge Group
Selections>Select None

Copy/Paste Beaded Frame as a new layer
Add drop shadow
Image>Free Rotate>Right 25 degrees
Copy/Paste Wood Frame as a new layer
Add drop shadow

Highlight bottom layer in layer pallete
Copy/Paste the close up tube of your choice
Resize if needed, I resized mine 75%
Add drop shadow

Copy/Paste another tube as a new layer
Add drop shadow
Add porcelain effect>Default Settings

 You may choose to place your embellishments the
same way I did, or you go with your own ideas! Use mine
only as an example, after all this is your tag!

I used:
(Remember to add a drop shadow
to each embellishment)

AllAmerican
Belle
(each of the above is Image>Free Rotate>
Right 25 degrees)

FeltHeartFlag
Image>Resize 40%
Image>Free Rotate>Left 25 degrees

Bow2
Highlight tube layer
Layers>Duplicate
Image>Resize 75%
Image>Mirror

Country and Girl
Image>Free Rotate>Left 25%
In Layer Palette lover opacity to
 44% for each

Guitar
Image>Free Rotate>Left 90 degrees
Image>Resize 20%

Add the proper copyright and license information

Resize to your preference, I used 80%

I used colors #94a4bbfor the foreground
and #000a33for the background for my name
2.0 Stroke
Font Size 72
I also gave my name a slight bevel using the following settings
If you want to use the white background you can
Layers>Merge>Merge All (Flatten)
File>Export>JPEG Optimizer
Set compression value to 25
Save to where you want

If you want to use the transparent background you can
File>Export>PNG Optimizer
Click “ok” on the next screen
Save to where you want

I hope you have enjoyed this tutorial!