Friday, March 9, 2012

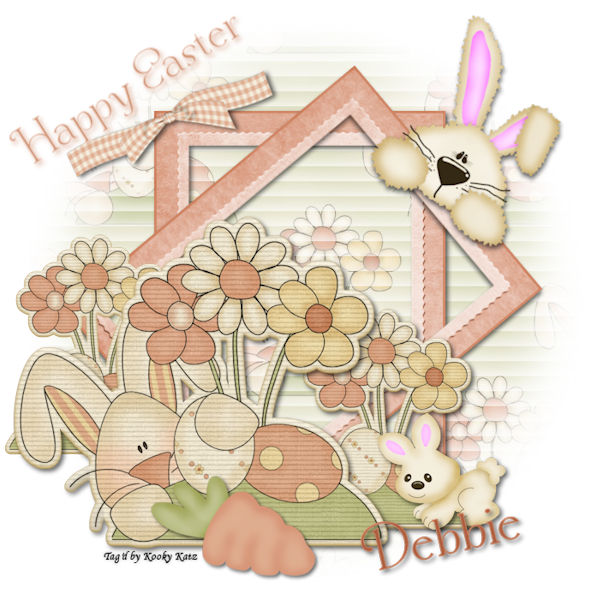
Bunnies and more Bunnies!

Bunnies and More Bunnies!

 Supplies
PSP - I am using PSP X2 (But an older version should work also)

I used the cute kit “Bunny Time” by S.G.Rowe Designs. 
You can purchase this kit from Scrappin Dollars.

Thank you Sandra for this wonderful kit full of bunnies!!

Mask of choice, I used Monti's Blinds Mask here


Notes
This tutorial assumes you have a working knowledge of PSP.
Install the mask if needed
Use the following settings for drop shadow,
unless otherwise stated:
Effects>3D>Drop Shadow>
V 3
H 3
Opacity 60
Blur 8
Color Black
Shadow on new layer unchecked


=^_^=   Ready to start?  Let’s go!  =^_^=

Open a new file, transparent, 700x700
Flood fill white

Copy/Paste Paper 12 as a new layer
Layers>Load/Save Mask>Load Mask From Disk
Fit to canvas checked
Source luminance checked
Invert transparency checked
Hide all mask checked
Layers>Merge>Merge Group

Copy/Paste Frame 5 as a new layer
Add drop shadow
Layers>Duplicate
Image>Free Rotate>Right 50%

I used the following embellishments:

Copy/Paste Sticker 1 as a new layer
Add drop shadow
Image>Resize 75%

Copy/Paste Ribbon 1
Image>Resize 25%
Add drop shadow
Image>Free Rotate>Left 25%

Copy/Paste Sticker 3 as a new layer
Add drop shadow
Image>Resize 50%
Layers>Duplicate>Move to left

Copy/Paste Bunny 4 as a new layer
Add drop shadow
Image>Resize 30%
Image>Free Rotate>Right 30%

Copy/Paste Carrot 1 as a new layer
Add drop shadow
Image>Resize 80%

Copy/Paste Bunny 1 as a new layer
Add drop shadow
Image>Resize 35%

 
Resize to your preference

Add your copyright and license number and text
Add your watermark

If you are using a white background you can
Layers>Merge>Merge All (Flatten)
File>Export>JPEG Optimizer
Set compression value to 25
Save to where you want

If you are using a transparent background you can
File>Export>PNG Optimizer
Click “ok” on the next screen
Save to where you want

I hope you have enjoyed this tutorial!

Tuesday, March 6, 2012

Just Ducky

Just Ducky!

 Supplies
PSP - I am using PSP X2 (But an older version should work also)

Scrapkit: Spring Party by HF-Projekte,
you can purchase it at Inspirations of Scrapsfriends

Thank you Heppy for a great kit to work with!
I fell in love with the duck!

Mask of choice, I used Mask 41 from Wee Scott Lass here

Template of choice, I used Template #31 from Scraps of Enchantment here

Tube of choice, I used the wonderful artwork of Cathy Martin
Used with group permission

Font of choice
Xero Plugin – Porcelain


Notes
This tutorial assumes you have a working knowledge of PSP.
Install the mask if needed
Use the following settings for drop shadow,
unless otherwise stated:
Effects>3D>Drop Shadow>
V 3
H 3
Opacity 60
Blur 8
Color Black
Shadow on new layer unchecked


=^_^=   Ready to start?  Let’s go!  =^_^=

Open up the template
Duplicate>Close the original
Click on bottom layer
Image> Canvas Size>700x700
Placement Center
Delete the top layer
Delete the dotted line layer
Delete topswirl and bottomswirl layers
Flood fill the bottom raster with white

 Open Paper 3>Resize>700x700 pixels
Copy/Paste Paper 3 above the white flood fill layer
Layers>Load/Save Mask>Load Mask From Disk
Source Luminance checked
Fit to Layer checked
Invert transparency not checked
Hide all mask checked
Layers>Merge>Merge Group

Highlight the white square layer
Click on it with your Magic Wand
Open Paper 2>Resize 700x700 pixels
Copy/Paste Paper 2 as a new layer
Selections>Invert
Tap your delete key on your keyboard
Apply porcelain effect
Selections>Select None
Delete the original white square layer

Highlight the black rectangle layer
Click on it with your Magic Wand
Open Paper 7>Resize 700x700
Copy/Paste Paper 7 as a new layer
Selections>Invert
Tap your delete key on your keyboard
Apply porcelain effect
Selections>Select None
Delete the original white square layer

Highlight the circle layer
Click on it with your Magic Wand
Open Paper 5>Resize 700x700
Copy/Paste Paper 5 as a new layer
Selections>Invert
Tap your delete key on your keyboard
Apply porcelain effect
Selections>Select None
Delete the original circle layer

Highlight the Scalloped Squarelayer
Click on it with your Magic Wand
Open Paper 3>Resize 700x700
Copy/Paste Paper 3 as a new layer
Selections>Invert
Tap your delete key on your keyboard
Apply porcelain effect
Selections>Select None
Delete the original circle layer
Highlight black flower layers
Click on it with your Magic Wand
Using color #6ba2ad flood fill
Add drop shadow
Apply porcelain effect
Selections>Select None

Highlight white flower layer
Click on it with your Magic Wand
Using color #fbecae flood fill
Add drop shadow
Apply porcelain effect
Selections>Select None

Highlight grey flower layer
Click on it with your Magic Wand
Using color #e7b99e flood fill
Add drop shadow
Apply porcelain effect
Selections>Select None

Embellishments I used:
Springparty1>Resize 15%
Layers>Duplicate>Image>Mirror
Springparty24>Resize 25%
Layers>Duplicate>Resize 50%
Layers>Duplicate>Resize 75%
Springparty23>Resize 15%
Springparty18>Resize 13%
Springparty14>Resize 13%
Springparty7>Resize 15%
Springparty3>Resize 50%
Layers>Duplicate>Move to the left

Resize to your preference

Add your copyright and license number and text
Add your watermark

If you are using a white background you can
Layers>Merge>Merge All (Flatten)
File>Export>JPEG Optimizer
Set compression value to 25
Save to where you want

If you are using a transparent background you can
File>Export>PNG Optimizer
Click “ok” on the next screen
Save to where you want

I hope you have enjoyed this tutorial!


Saturday, March 3, 2012

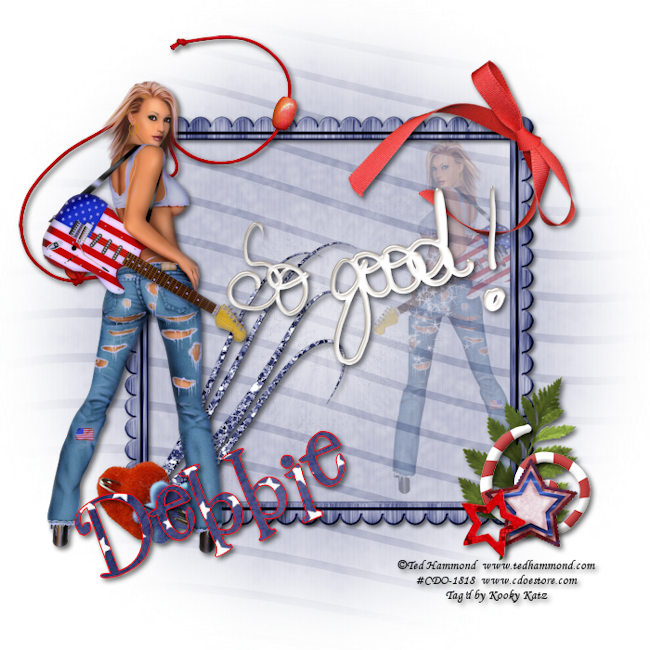
Miss Independent

Miss Independent

 Supplies
PSP - I am using PSP X2 (But an older version should work also)

I used the adorable kit “Miss Independent” by Polka Dot Scraps
You can purchase this kit from

Thank you Chassity for this adorable kit!

Tube of choice, I used the wonderful artwork of Ted Hammond
You will need a license to use his work,
you can get one here

Mask of choice, I used Mask 25 from Horse Play’s Pastures here

Font of choice, I used 2Peas Mr. Giggles, here

Xero Plugin – Porcelain


Notes
This tutorial assumes you have a working knowledge of PSP.
Install the mask if needed
Use the following settings for drop shadow,
unless otherwise stated:
Effects>3D>Drop Shadow>
V 3
H 3
Opacity 60
Blur 8
Color Black
Shadow on new layer unchecked


=^_^=   Ready to start?  Let’s go!  =^_^=

File> New
Image> Canvas Size>700x700
Flood fill with white

Layers>New Raster
Selections>Select All
Copy Paper6
Paste into selection
Layers>Load/Save Mask>Load Mask From Disk
Source Luminance checked
Fit to Layer checked
Invert transparency not checked
Hide all mask checked
Layers>Merge>Merge Group
Selections>Select None

Copy/Paste Frame 1 as a new layer
Image>Resize 80%
Add drop shadow

Copy/Paste your tube as a new layer
Add drop shadow
Apply porcelain effect>default settings
Layers>Duplicate
Image>Resize 50%
Image>Mirror
Place under the mask layer
On Layer Palette, lower opacity to 47%

 Add your embellishments, I used the following:

Star1>Resize 25%
Star2>Resize 15%
Swirl1>Resize 20%
Leaves1>Image>Free Rotate>Right>
 20 degrees>Resize 35%
Ribbon1>Resize 50%
String1>Resize 50%
Clip1>Resize 40%
Accent1>Resize 50%
WA1>Resize 50%

For your text
Open Paper1
On your Materials Palette,
Use the following settings
for your background

For your foreground use color #ff0000
Using 2Peas Mr. Giggles
Font size 100
Stroke width 1
Floodfill your text with your pattern

Add your copyright and license number and text
Add your watermark

 If you are using a white background you can
Layers>Merge>Merge All (Flatten)
File>Export>JPEG Optimizer
Set compression value to 25
Save to where you want

If you are using a transparent background you can
File>Export>PNG Optimizer
Click “ok” on the next screen
Save to where you want

I hope you have enjoyed this tutorial!


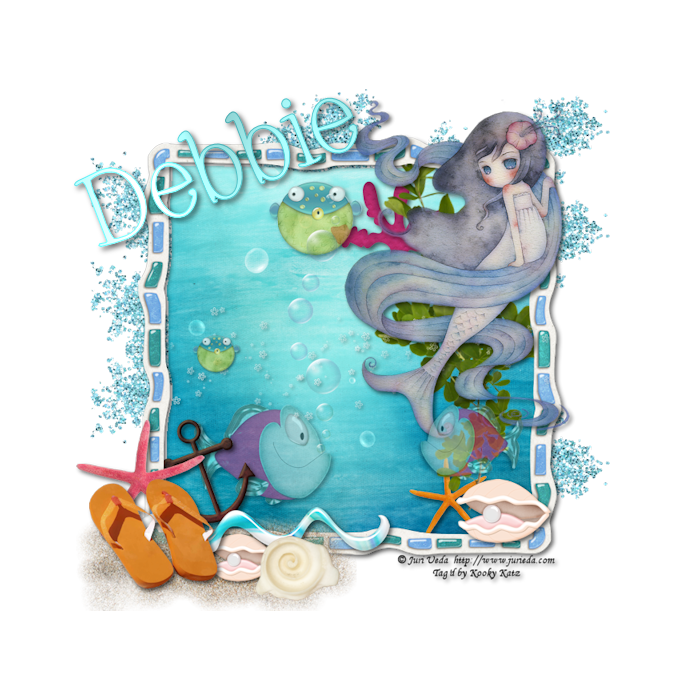
Me, The Sea and My Friends

Me, the Sea and My Friends

 Supplies
PSP - I am using PSP X2 (But an older version should work also)

I used the cute kit “Under the Sea” by Pimp’d Designz  
You can purchase this kit from

Thank you Cora this was a fun kit to play with!
 
Tube of choice, I used the wonderful artwork of Juri Ueda Marie
Used with group permission

Font of choice, I used Whackadoo, here

Xero Plugin – Porcelain


Notes
This tutorial assumes you have a working knowledge of PSP.
Install the mask if needed
Use the following settings for drop shadow,
unless otherwise stated:
Effects>3D>Drop Shadow>
V 3
H 3
Opacity 60
Blur 8
Color Black
Shadow on new layer unchecked


=^_^=   Ready to start?  Let’s go!  =^_^=

File> New
Image> Canvas Size>700x700
Flood fill with white

Copy/Paste Frame 02 as a new layer
Image>Resize>90%
Add drop shadow

Click inside your frame with your Magic Wand
Selections>Modify>Expand by 5
Copy/Paste PP10 as a new layer
Selections>Invert
Tap your delete key on your keyboard
Layers>Arrange>Move Down
Selections>Select None

Copy/Paste your tube as a new layer
I resized mine 75%
Add drop shadow
Apply porcelain effect>default settings

Copy/Paste Fish02 as a new layer
Image>Mirror
Image>Resize 35%
Add drop shadow
On layer Palette, lower opacity to 56%

Copy/Paste Fish01 as a new layer
Image>Resize 30%
Add drop shadow
On layer Palette, lower opacity to 71%

Copy/Paste Flipflops as a new layer
Image>Mirror
Image>Resize 50%
Add drop shadow

Copy/Paste Sand01 as a new layer
Image>Resize 50%
Layers>Arrange>Move down below the flipflops

Copy/Paste shell_w pearl as a new layer
Image>Mirror
Image>Resize 20%
Add drop shadow
Layers>Duplicate
Image>Resize 75%
Move down to your flipflops

Copy/Paste Shell01
Image>Resize 35%
Move down by the flipflops

Continue add any more embellishments
you would like! After all this is your tag!
Resize to your preference

Add your copyright and license number and text
Add your watermark

If you are using a white background you can
Layers>Merge>Merge All (Flatten)
File>Export>JPEG Optimizer
Set compression value to 25
Save to where you want

If you are using a transparent background you can
File>Export>PNG Optimizer
Click “ok” on the next screen
Save to where you want

I hope you have enjoyed this tutorial!


Dreaming

Dreaming

 Supplies
PSP - I am using PSP X2 (But an older version should work also)

Supplies
PSPX2 (an older version will work also)

Scrapkit: Calming Waters by Sunshine Daze
you can purchase it at her store Sunshine Daze
Thank you Dawn for such a pretty kit to work with!

Tubes of choice - I am using the artwork of Suzanne Woolcott,
you can purchase her work here

 Mask of choice, I am using EVG_GrungeMask5
You can find this mask at Creative Misfits

Font of choice, I used Corky (a paid font) here

This tutorial assumes you have a good working knowledge of PSP.
Use the following settings for drop shadow, unless otherwise stated:
Effects>3D>Drop Shadow>
V 6
H 5
Opacity 75
Blur 12
Color Black
Shadow on new layer unchecked

=^_^=   Ready to start?  Let’s go!  =^_^=

Open a new file, transparent, 700x700
Flood fill white

Layers>New Raster Layer
Selections>Select All
Open paper 1>Resize to 700 x700
Copy/Paste Paper 1 Into Selection
Layers>Load/Save Mask>Load Mask From Disk
Fit to canvas checked
Source luminance checked
Invert transparency not checked
Hide all mask checked
Layers>Merge>Merge Group
Selections>Select None

Open SSDCWel 6>Resize 25%
Copy/Paste as a new layer
Add drop shadow

If you are using the same tube I am,
copy/paste as a new layer
Position so it is on the ledge of the
window sill
Add drop shadow
Apply porcelain effect
using default setting

The embellishments I used are:
SSDCWel 24>Resized 25%
SSDCWel 38>Resize 15%
SSDCWel 37>Resize 20%
SSDCWel 26>Resize 10%
SSDCWel 19>Resize 15%
SSDCWel 22>Resize 10%
SSDCWel 13>Resize 25%
Using your eraser tool, erase
Any foliage you do not want showing
SSDCWel 2>Resize 10%
SSDCWel 8>Resize 10%
SSDCWel 9>Resize 15%
SSDCWel 15>Resize 13%
Image>Mirror

 Close off the white bottom layer

Layers> Merge>Merge Visible

Resize to 600x600 pixels
I used colors #73788c for the foreground
and #c7cbcb for the background for my name
1.0 Stroke
Font Size 72
I also gave my name a slight bevel using the following settings


 Add the proper copyright and license information

If you want to use the white background you can
Layers>Merge>Merge All (Flatten)
File>Export>JPEG Optimizer
Set compression value to 25
Save to where you want

If you want to use the transparent background you can
File>Export>PNG Optimizer
Click “ok” on the next screen
Save to where you want

I hope you have enjoyed this tutorial!